School Website Admin Panel Documentation
School Website Admin Panel Documentation
This guide helpsschool administrators and staff manage and update the school’s official website using the Admin Panel, without technical knowledge.
What this Admin Panel does
The School Website Admin Panel allows you tocontrol what appears on the school website. Any content you add, edit, or delete from the Admin Panel will beinstantly reflected on the live website, including:
- Introduction and Overview
- Getting Started - Login Instructions
- Admin Panel Overview
- Homepage
- About Us
- Academics
- Gallery
- Admission
- School Life
- Alumni
This documentation provides step-by-step guidance for managing each website section, ensuring your school website remains updated, accurate, and engaging for parents, students, and visitors.
Introduction and Overview
This documentation provides clear and comprehensive instructions for managing your school website through theAdmin Panel.
The system is designed as a dynamic content management platform, enabling authorized administrators to update content, images, and information easily, without requiring any technical expertise.
What You Can Manage
- Homepage – Hero section, banners, and key content etc…
- About Page – School history, mission, vision, and other details etc…
- Photo Gallery – Upload, organize, and manage images etc…
- Contact Information – Address, phone numbers, email, and maps etc…
- Navigation Menu – Add, remove, or edit menu items etc…
- Website Text Content – Update all written content across the site etc…
- Images & Media Files – Manage and replace media assets etc…
Getting Started - Login Instructions
Accessing the Admin Panel
- Step 1: Open your web browser and navigate to the admin panel URL:
- Step 2: Enter your login credentials.
- Step 3: Click the Login button to access the dashboard.
Admin Panel Overview
Once you log in, you will be directed to theMain Dashboard, which provides a quick snapshot of your website’s activity and management tools. The admin panel is organized into clear sections, each corresponding to different areas of your website.
Page Visibility Control
Every page in the admin panel includes a “Visible” toggle button.
- If the toggle is ON, the page will be displayed on the website.
- If the toggle is OFF, the page will be hidden from the website, but still available in the admin panel for editing or future use.
Dashboard Features
- Dashboard Overview
Here, you can view important statistics at a glance, including:
- Total Active Pages
- Total Blogs
- Total Events
- Total Photos
- Quick Actions
The quick action cards allow you to instantly manage different sections of your website:
- Pages – View and manage all website pages.
- Blogs & News – Direct access to the blogs and news section where you can add, update, or delete posts.
- Events – Events are fetched from the SMS Admin Panel. You can choose which events to display on the website.
- Testimonials – View, add, update, or delete testimonials.
- Gallery – Create albums and upload images into them for better organization.
- Settings – Manage site-wide information such as school name, phone number, email, and location.
Pages
View and manage all website pages.
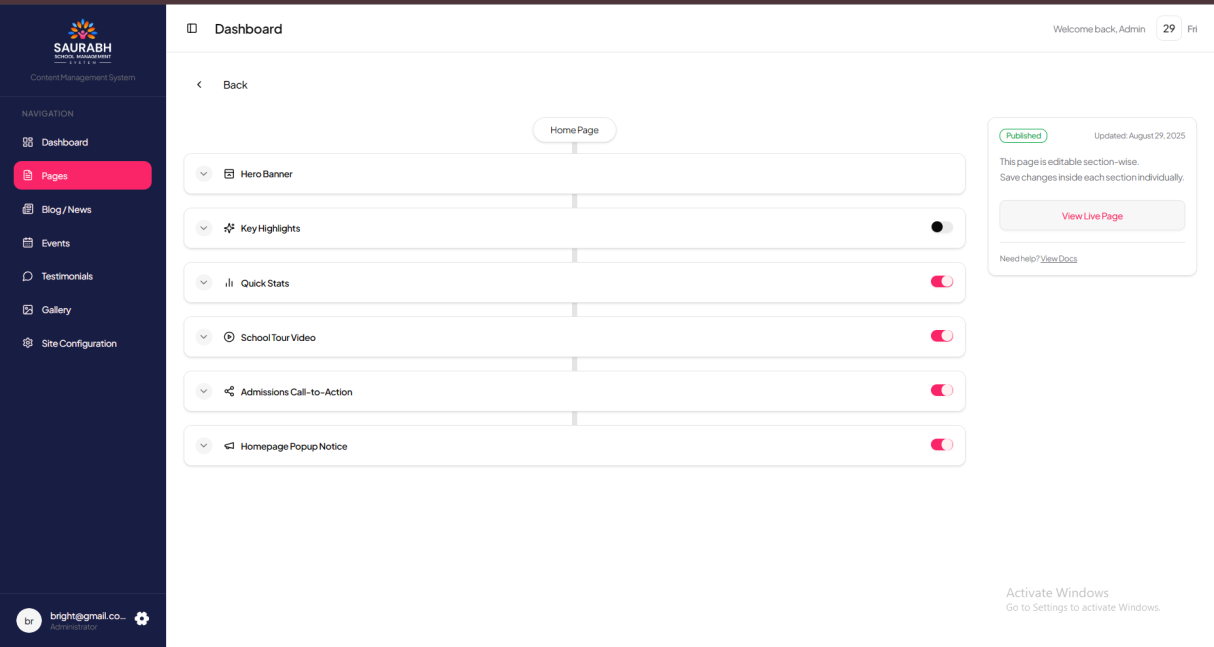
1. Homepage Management
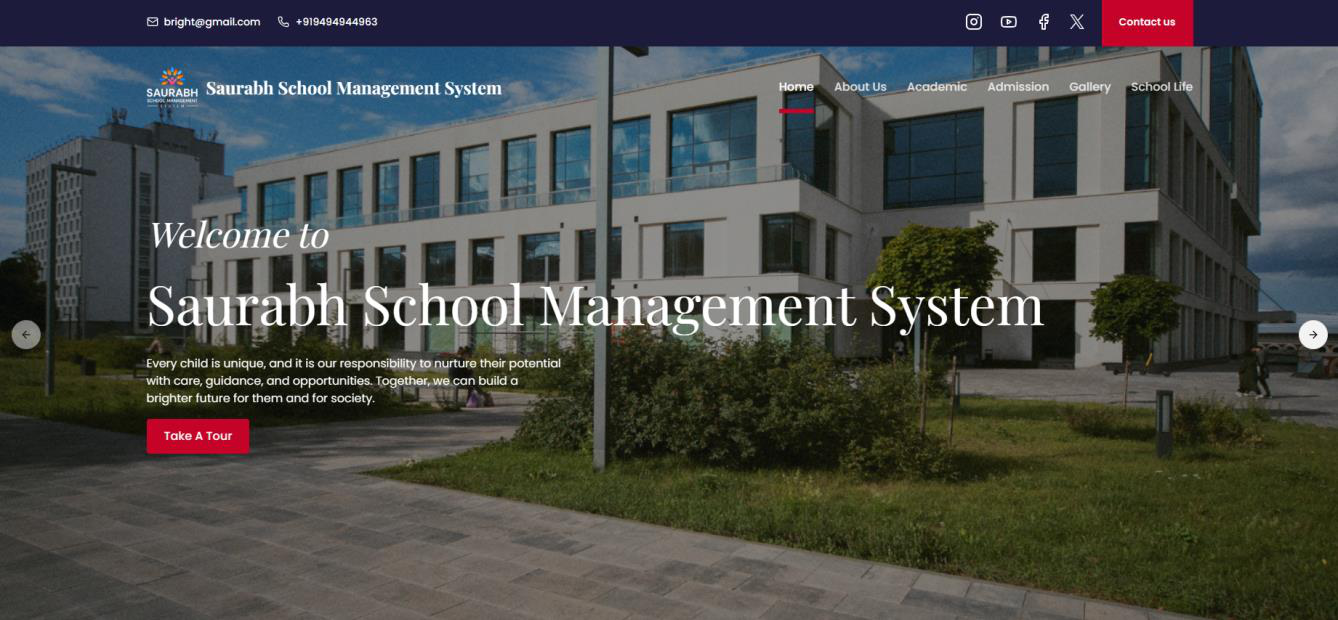
The Homepage is the first impression of your school website. From the admin panel, you can manage and customize the following sections:
Hero Slider Section
Hero Slider Section – Update the main banner slider that appears at the top of the homepage.
Admin Panel:
Website View: The updated slider will be visible on the homepage hero section. If you add multiple hero sections, navigation arrows will appear so visitors can slide through the banners.
Highlight Cards
Highlight Cards – Manage the cards displayed right below the hero section (e.g., quick links or featured highlights).
Admin Panel:
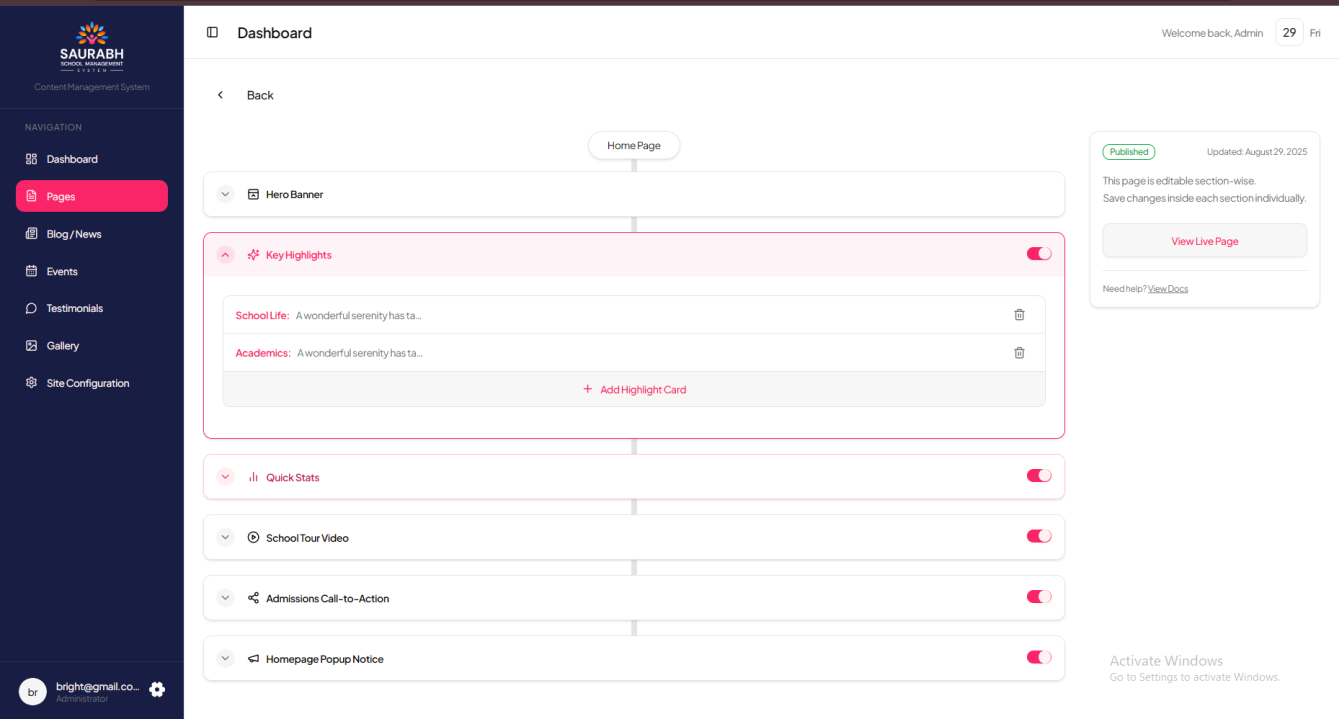
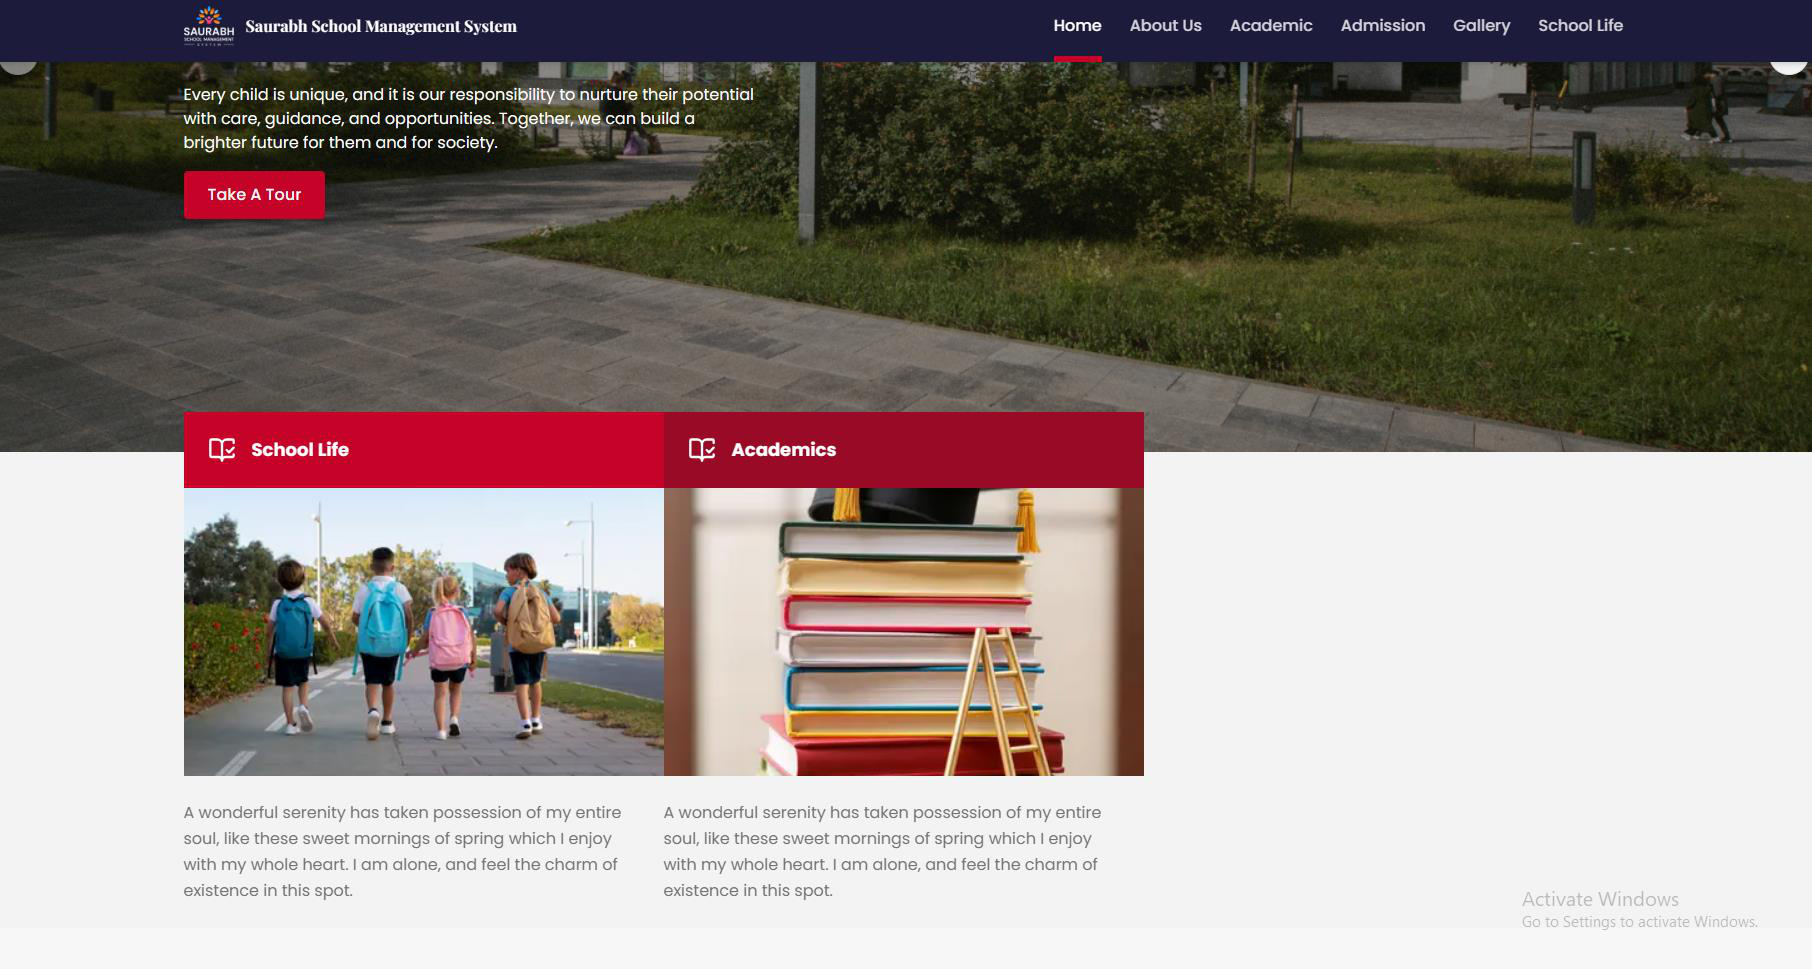
Website View: The updated cards will appear right after the hero section. If multiple cards are added, they will be displayed in line (side-by-side) on the homepage.
Stats Section
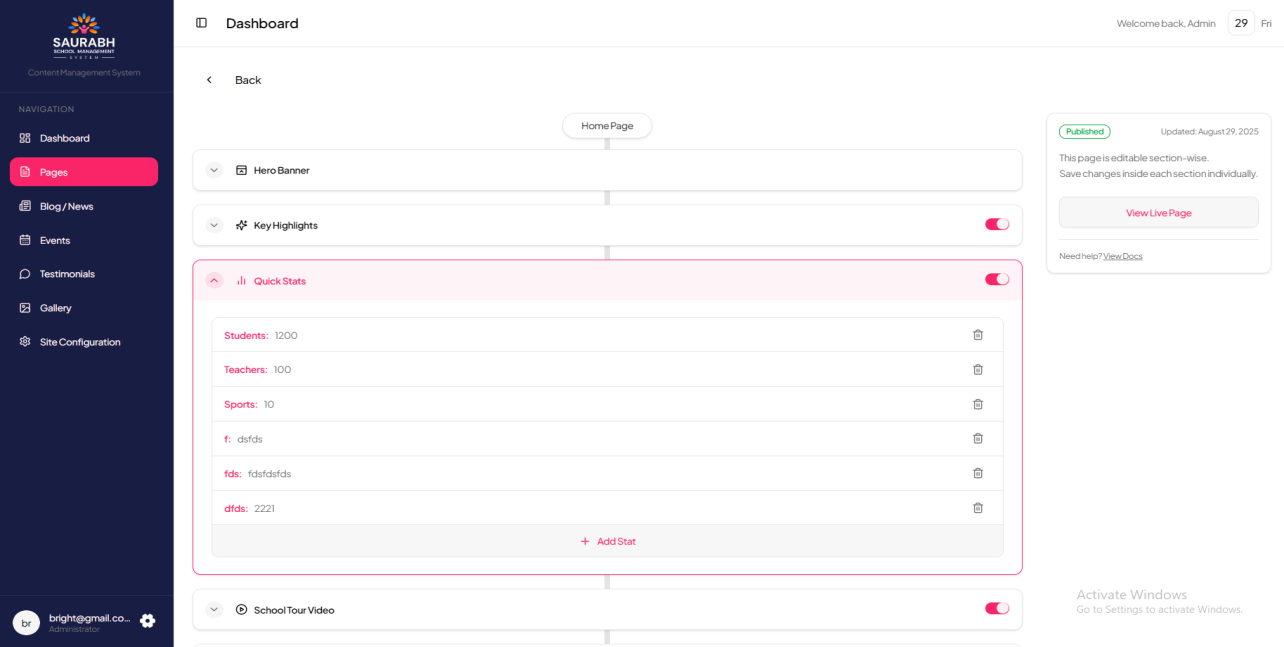
Stats Section –
Admin Panel: Add or edit key school statistics such as number of students enrolled, total teachers, awards/achievements, and other important figures. You can set a title and number for each stat.
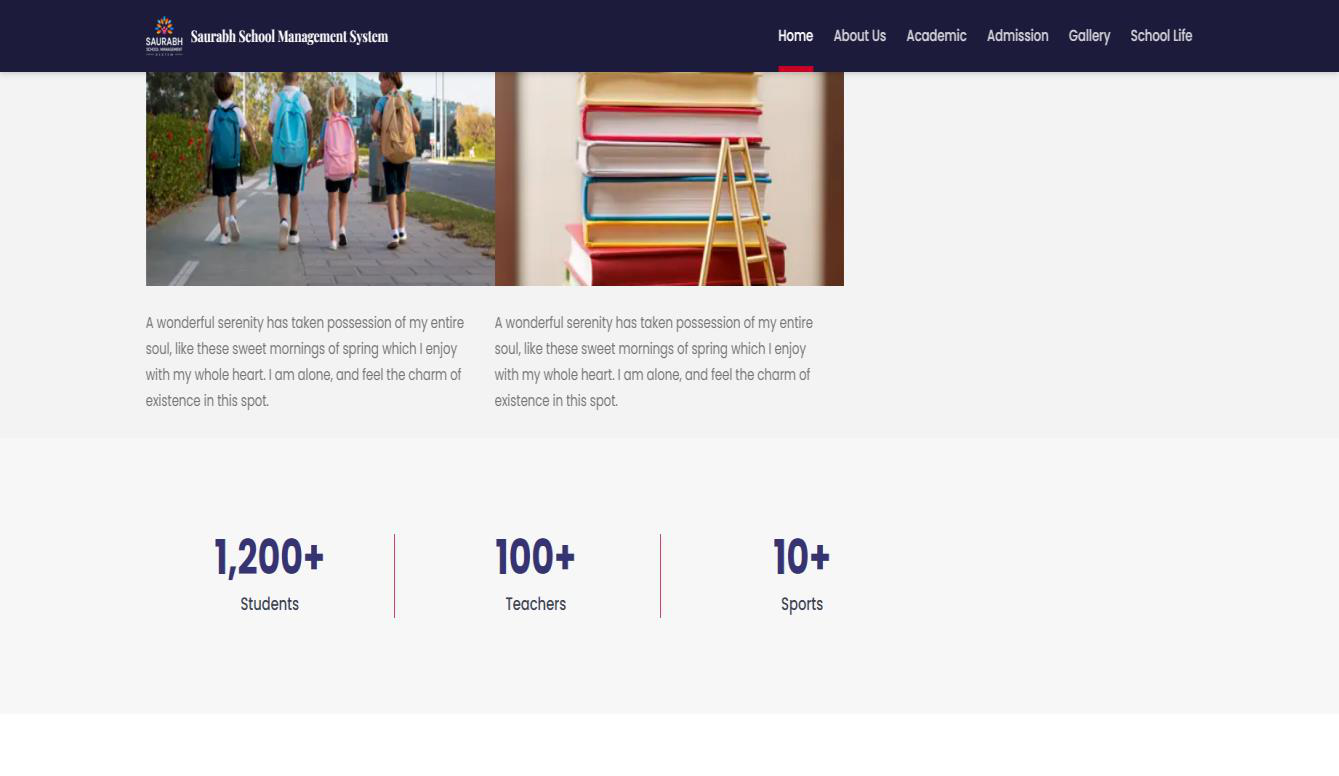
Website View: The updated statistics will appear on the homepage after the highlight cards section. If multiple stats are added, they will be displayed in line with animated counters for better visual impact.
School Video Tour & Admissions Call-to-Action (CTA) Section
School Video Tour & Admissions Call-to-Action (CTA) Section –
Admin Panel:
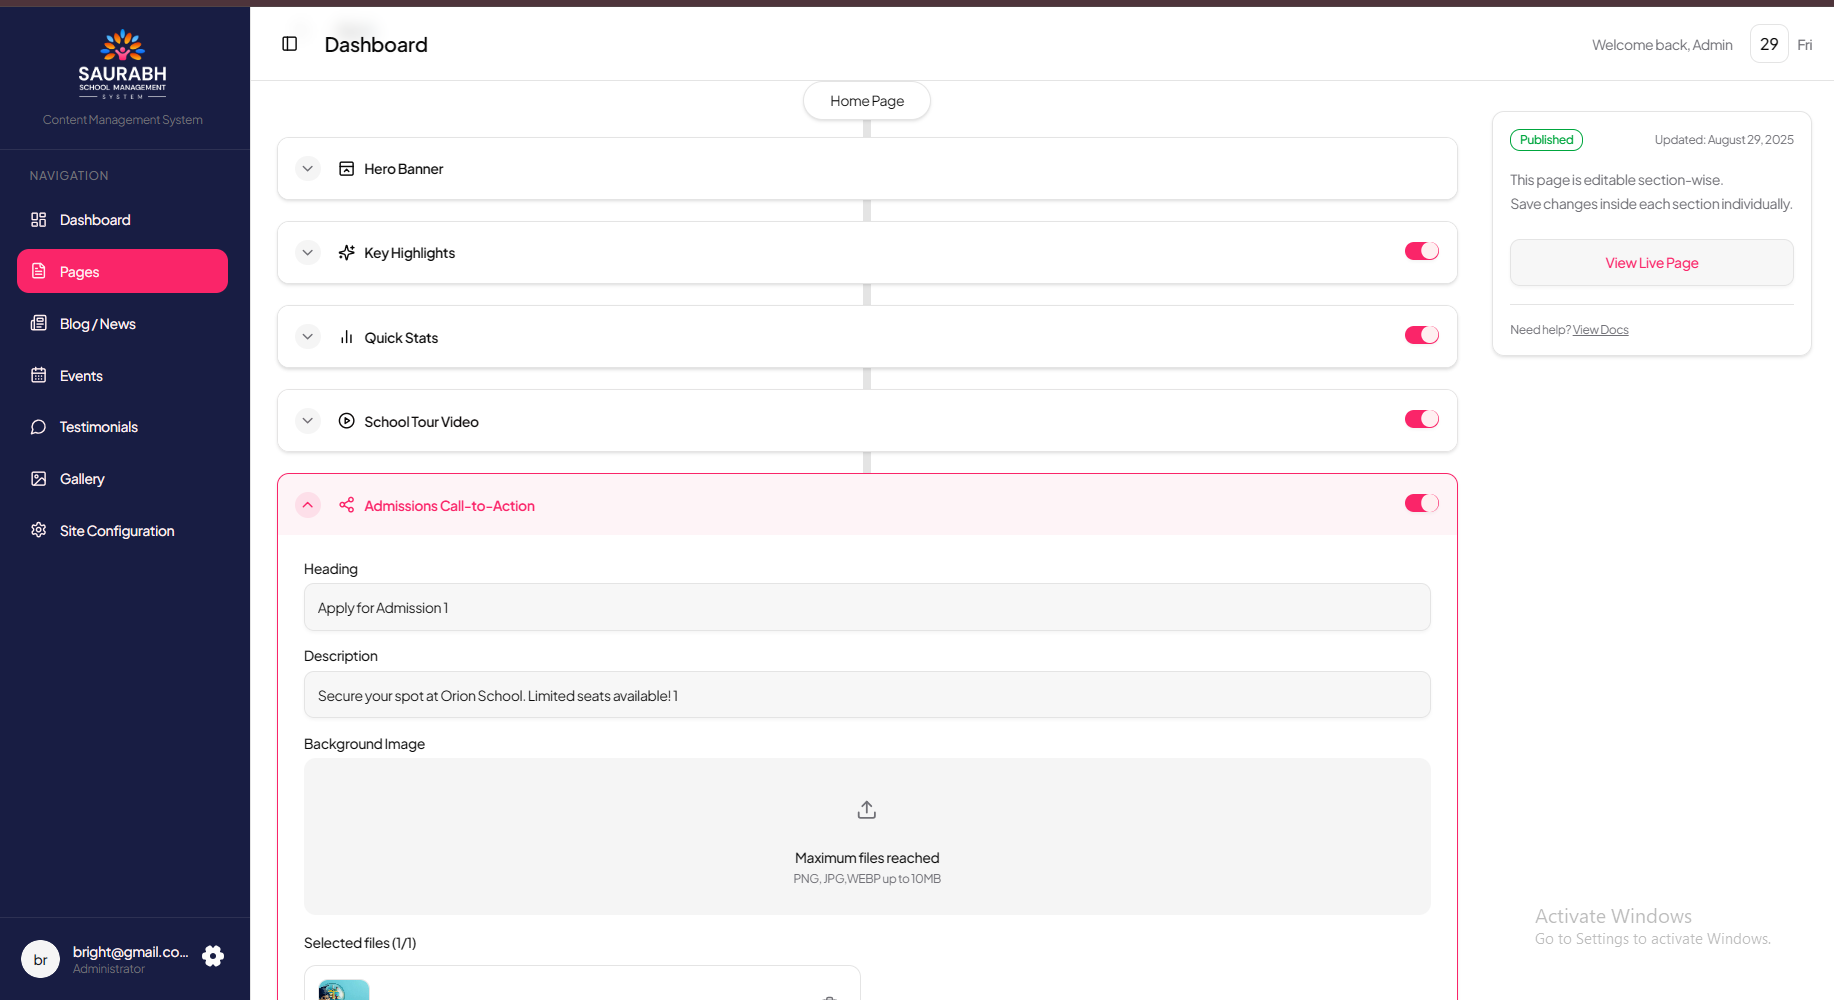
- School Video Tour: Upload or update the featured school introduction video. You can add a YouTube link or upload a video file.
- CTA Section: Add important call-to-action buttons such as “Apply for Admission”, “Join Now”, or other custom links to guide visitors.
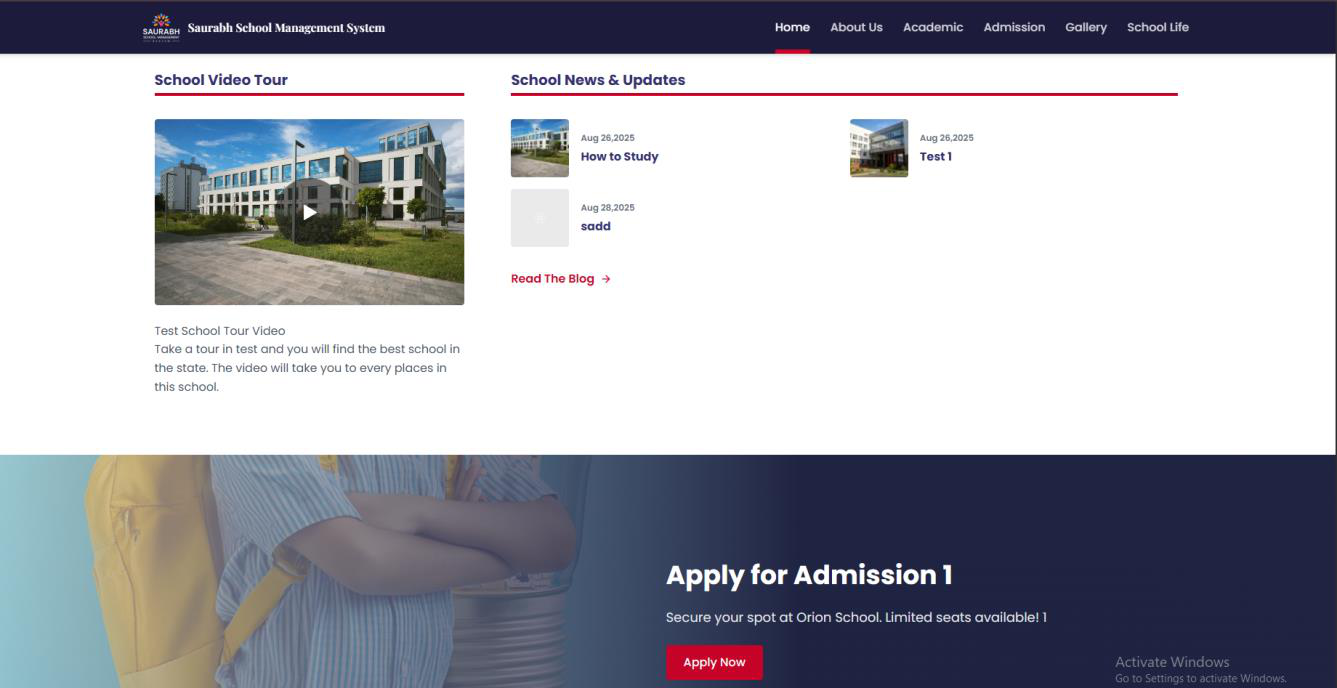
Website View:
On the homepage, the School Video Tour will be displayed first. Beside the video, visitors will also see the latest News & Blogs of the school (fetched from the Blogs section in the admin panel). Immediately after the video and blogs, the Call-to-Action Section will appear, allowing visitors to take action through the highlighted CTA buttons.
Announcement Popup
Announcement Popup – Configure a daily popup announcement that appears when a visitor first enters the homepage (e.g., admission alerts, upcoming events, notices).
All of the above sections can be easily added, edited, or updated from the admin panel without technical knowledge.
2. About Us Page Management
The About Us page helps communicate the school’s story, values, and leadership vision. From the admin panel, you can manage the following sections:
About Us Section
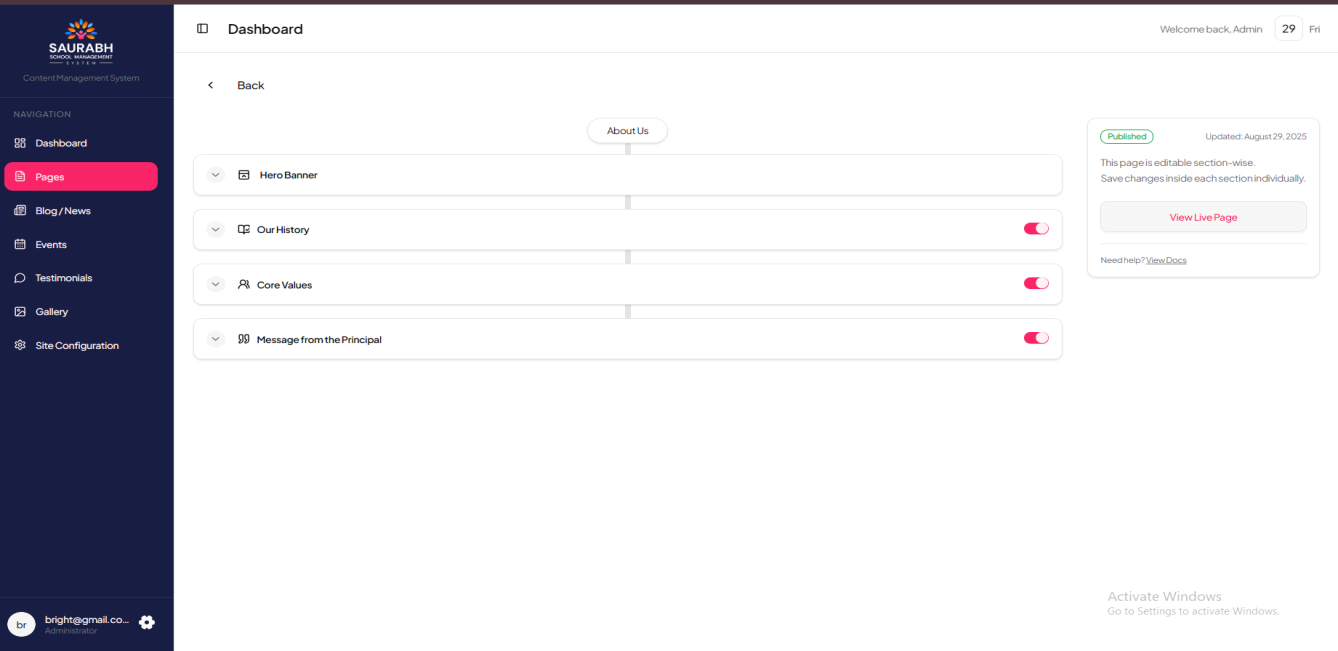
About Us Section –
Admin Panel: From the About Us page settings, you can manage four main sections. In the Hero Section, you can upload or update the banner with title, subtitle, and background image. In the Our History Section, you can add or edit details about the school’s foundation, milestones, and growth journey. The Core Values Section allows you to define guiding principles with titles, descriptions, and optional icons or images. Lastly, in the Principal’s Message Section, you can upload or update the Principal’s welcome note along with name, text, and photo.
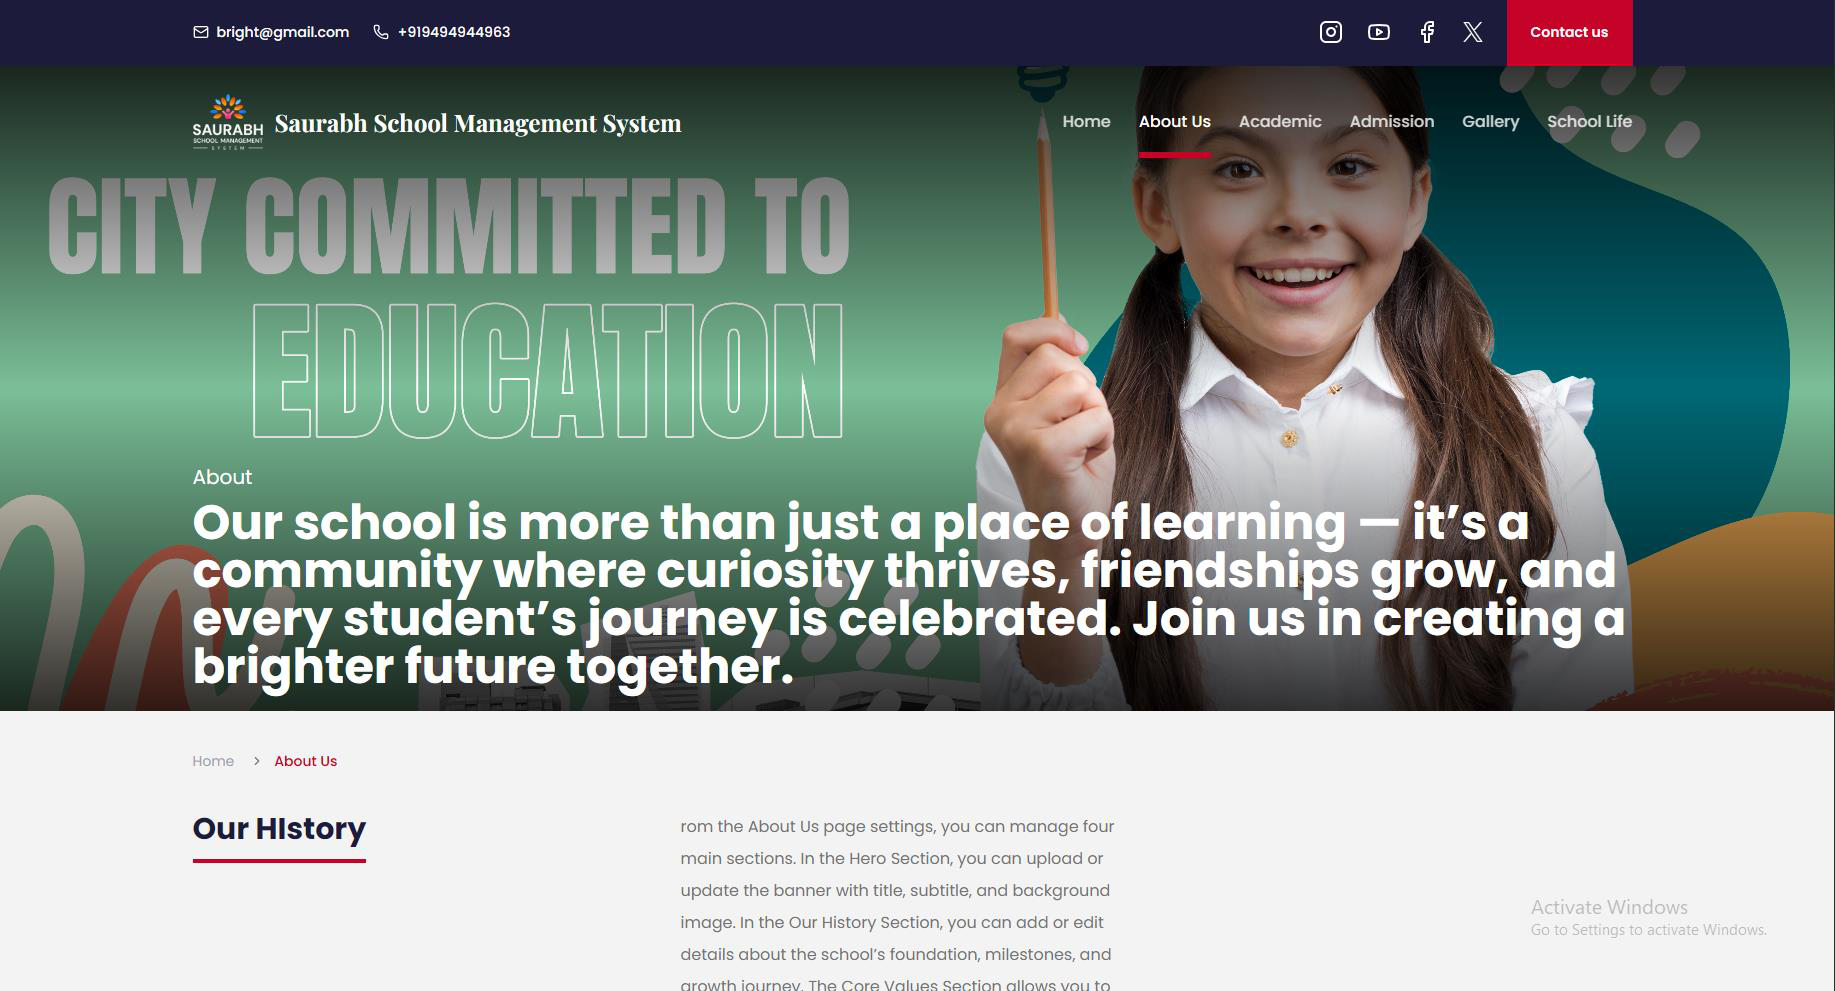
Website View:
On the About Us page, the Hero Section appears at the top as a welcoming banner. Below it, the Our History Section showcases the school’s background and milestones. The Core Values Section is displayed next, highlighting the school’s principles in card or list format. Finally, the Principal’s Message Section is shown as a dedicated block with the Principal’s photo and message, creating a personal connection with visitors.
Each section can be added, updated, or edited directly from the admin panel to keep the content fresh and relevant.
3. Academics Page Management
The Academics section of the website is divided into multiple subpages, each focusing on a different aspect of the school’s academic structure. Every page includes a Hero Section at the top and customizable page-specific content.
You can manage the following pages:
- Why Study – Present reasons why students and parents should choose your school.
- Methodology & Learning – Explain the teaching approach, learning strategies, and methodologies used.
- Faculty – Showcase teacher profiles, qualifications, and expertise.
- Achievements – Highlight academic and extracurricular achievements of the school.
- Pre-Primary – Information about early childhood education programs.
- Primary (Class 1–5) – Details of the curriculum, activities, and learning outcomes for primary students.
- Middle School (Class 6–8) – Curriculum structure, subjects, and growth areas for middle school.
- Secondary & Sr. Secondary (Class 9–12) – Information on secondary and senior secondary education, subjects, streams, and preparation for board exams.
Each subpage allows you to edit the Hero Section image/text and update the content block to ensure that academic details remain accurate and up to date.
4. Admission Page Management
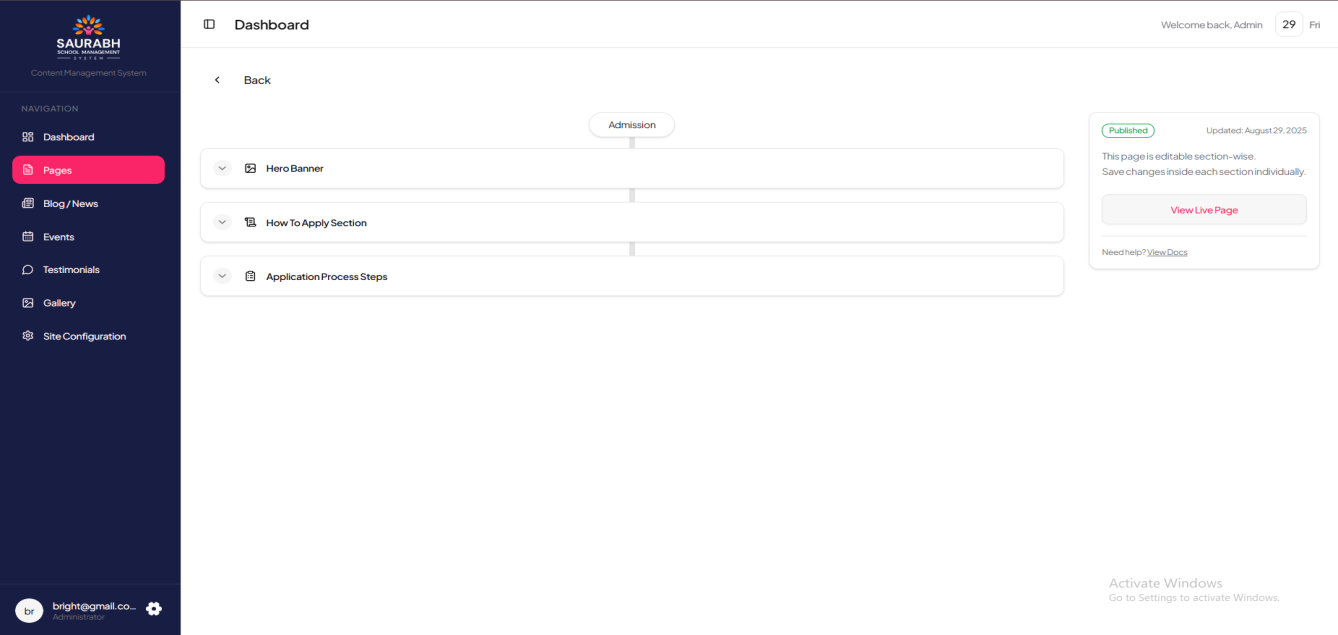
The Admission page is designed to guide prospective students and parents through the enrollment process. From the admin panel, you can manage the following sections:
- Hero Section – Update the main banner and introductory message for the Admission page.
- How to Apply – Provide clear step-by-step instructions for the application process.
- Admission Process – Outline the detailed admission procedure, including eligibility, required documents, and important dates.
Website View:
On the Admissions page, the Hero Section appears at the top as a banner introducing the admissions process. Directly below, the How to Apply Section displays clear instructions on applying to the school. This is followed by theApplication Process Section, where each step is shown in a structured, easy-to-understand format, helping parents and students smoothly navigate the admission journey.
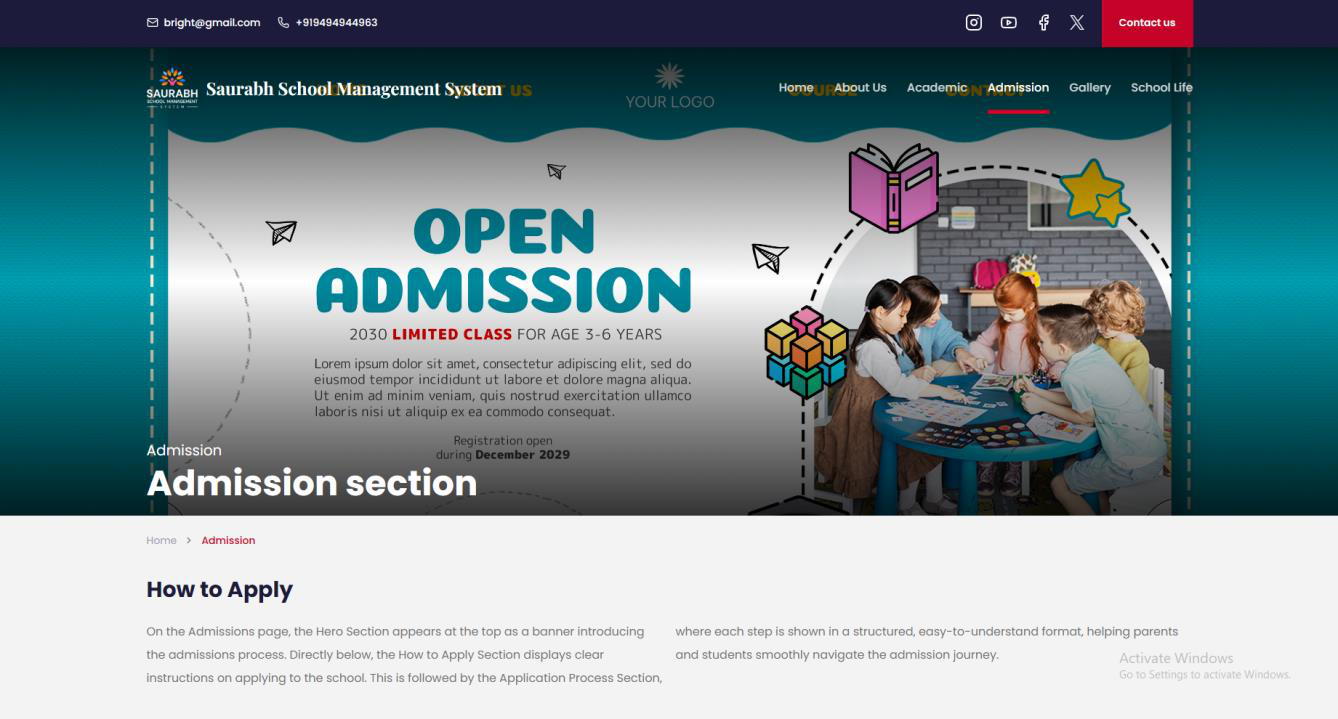
Each section can be added, updated, or edited directly from the admin panel, making it easy to keep admission details current for every academic year.
5. Gallery Page Management
The Gallery page allows you to showcase your school’s events, activities, and achievements through albums and images. From the admin panel, you can manage:
- Albums – Create new albums with titles and descriptions (e.g., Annual Day 2025, Sports Week, Science Fair).
- Images – Upload and organize images within each album. You can add multiple photos to an album to present events or categories clearly.

Website View:
On the Gallery page, all created albums will be displayed in a grid or list format with their titles and cover images. When a visitor clicks on an album, theimages inside it will open in a gallery view or slideshow, allowing them to browse through school events and activities.
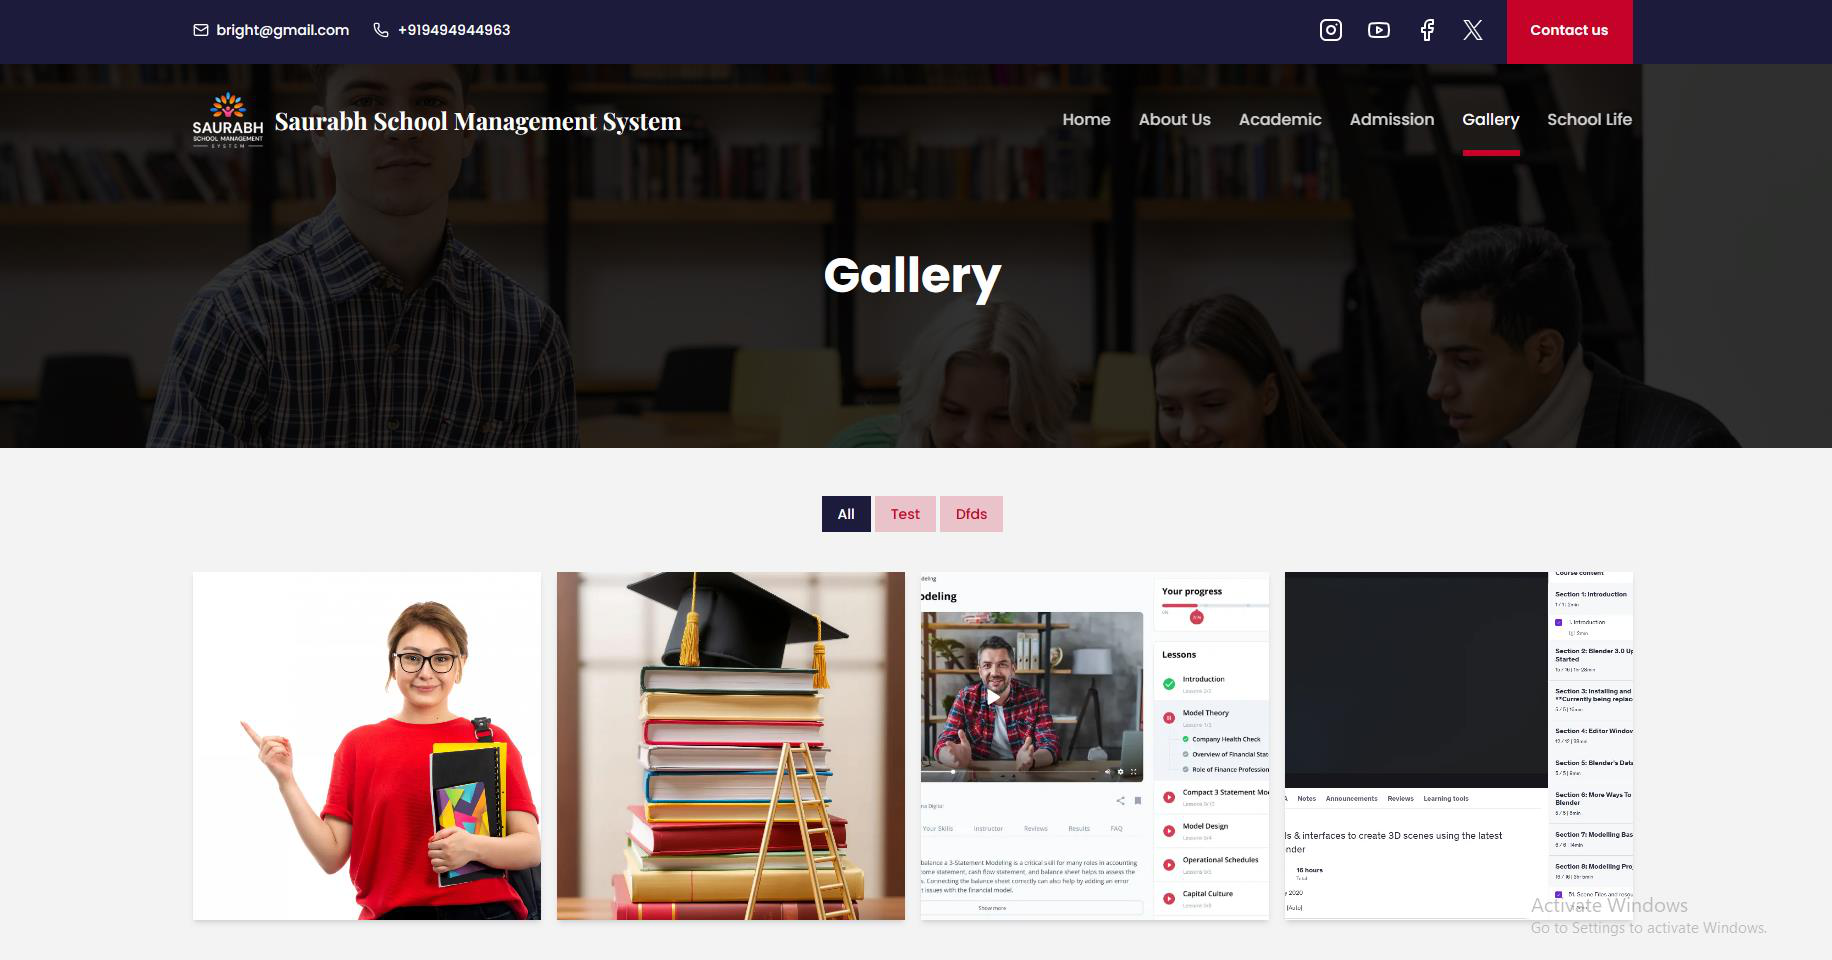
This feature helps keep your website visually engaging and up to date with the latest school highlights.
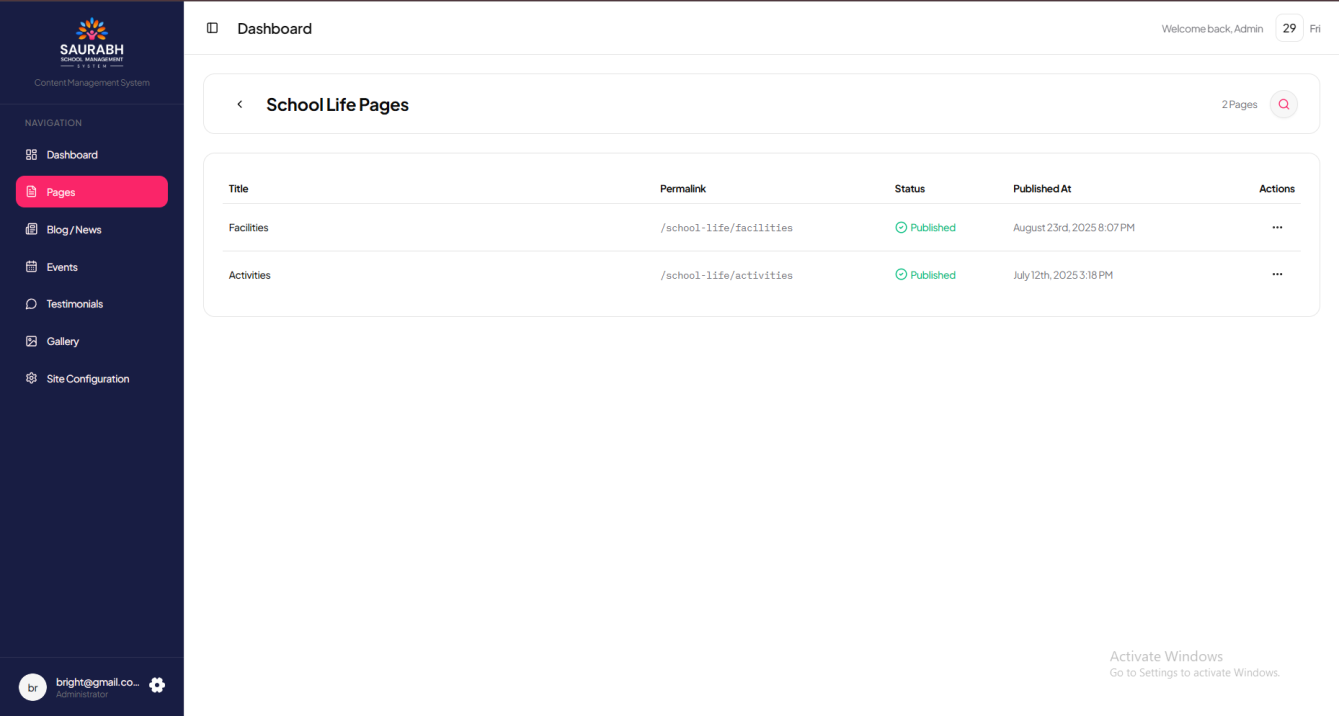
6. School Life Page Management
The School Life section highlights the vibrant and engaging environment of the school. It is divided into two main parts: Facilities and Activities.
1. Facilities
- Hero Section – Update the banner and introduction for the Facilities page.
- Facilities List Section – Add and manage a detailed list of facilities offered (e.g., library, computer labs, sports facilities, transport, hostel, etc.).
2. Activities
- Hero Section – Update the banner and introduction for the Activities page.
- Activities List Section – Add and manage a list of co-curricular and extracurricular activities (e.g., cultural programs, sports, clubs, competitions).
Website View:
On the School Life page, theFacilities Hero Section appears at the top followed by the Facilities List Section, where all facilities are displayed in a structured and visually engaging format. Similarly, on the Activities page, theActivities Hero Section introduces the page, followed by the Activities List Section, which showcases all available co-curricular and extracurricular activities to highlight the vibrant student life at the school.
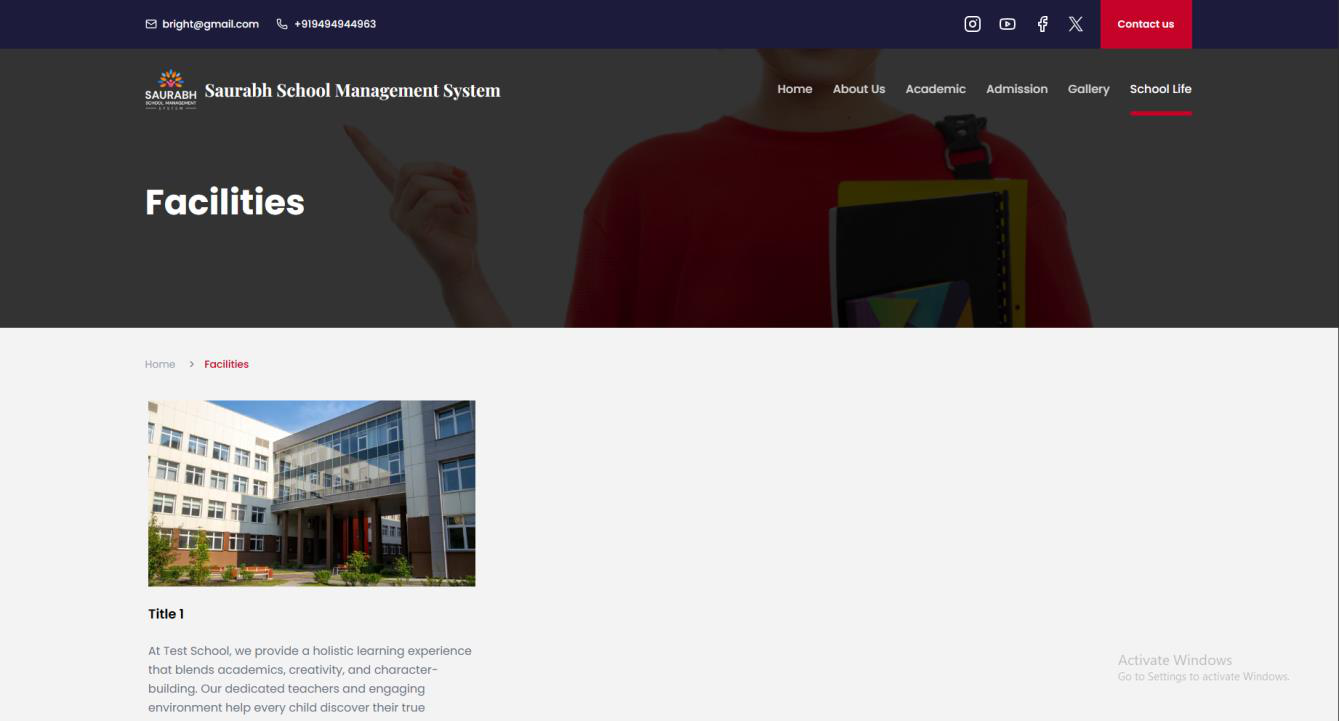
Facilities page
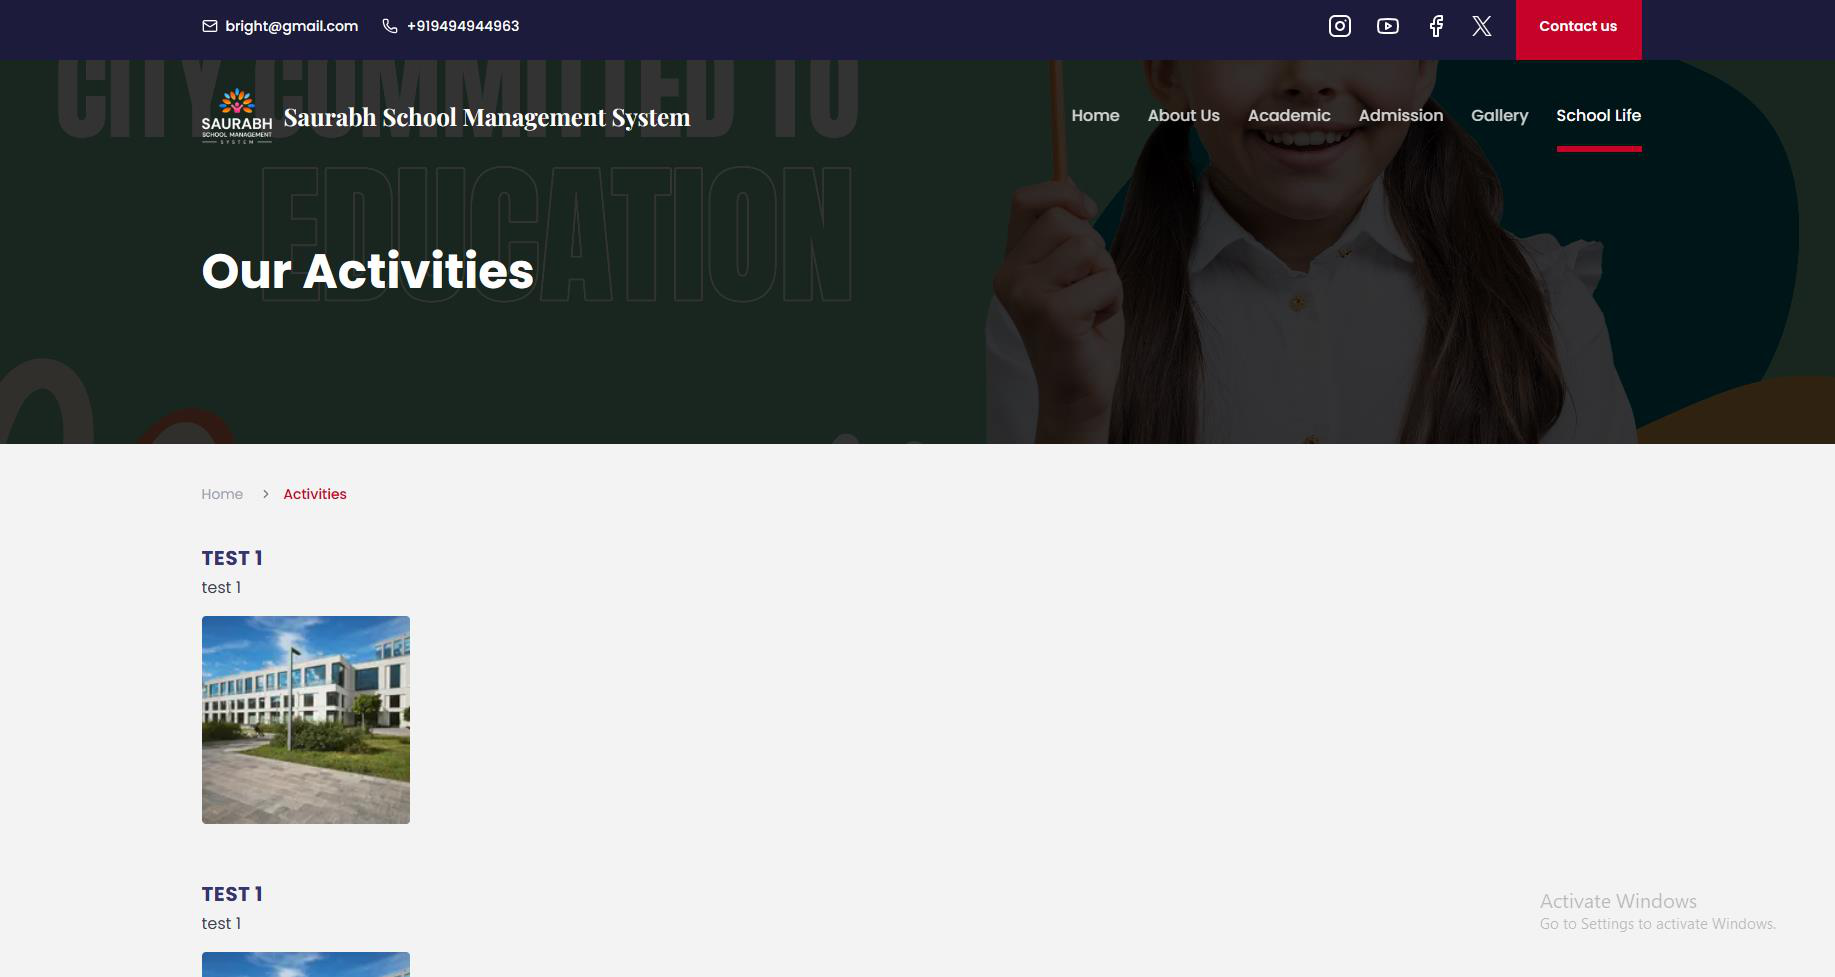
Activities page
Both Facilities and Activities pages can be added, updated, or edited easily from the admin panel to keep information accurate and engaging.
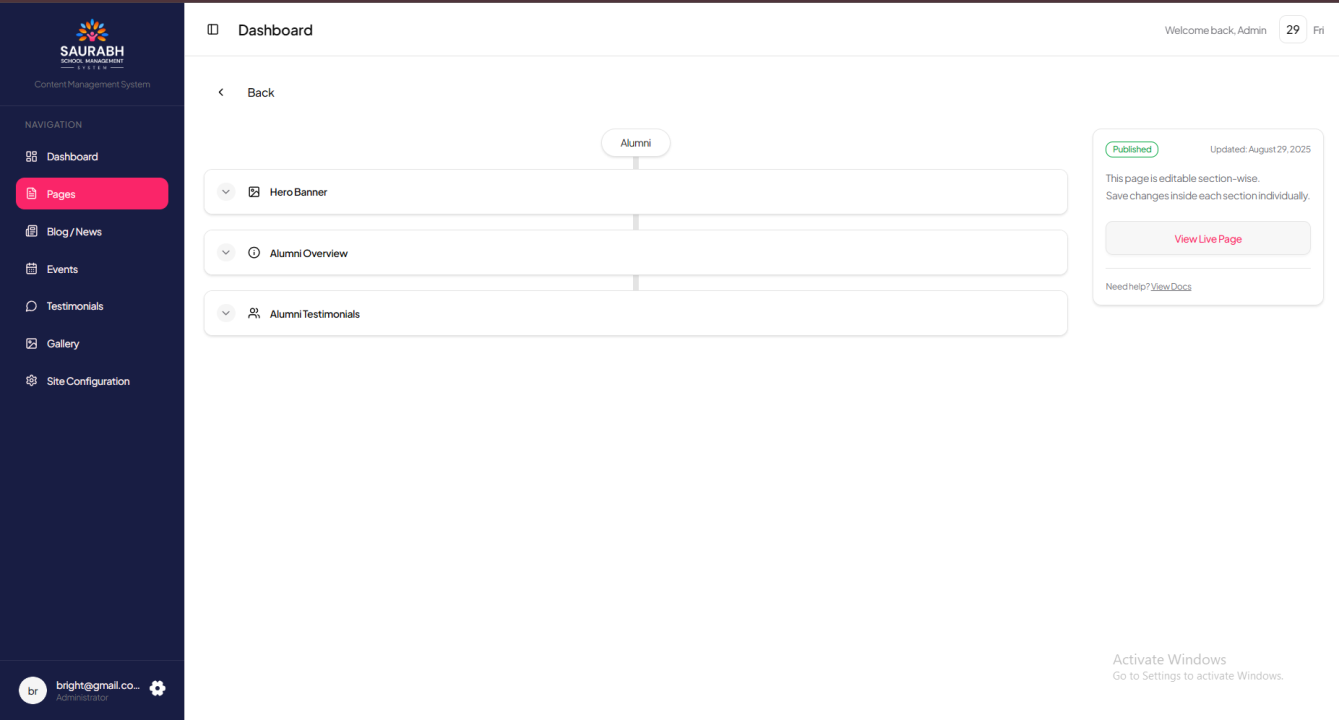
7. Alumni Page Management
The Alumni page is dedicated to showcasing past students, their journeys, and their contributions to the school’s legacy. From the admin panel, you can manage the following sections:
- Alumni Hero Section – Update the banner and introduction for the Alumni page.
- Alumni Info Section – Share details, stories, or highlights about the school’s alumni network and its impact.
- Testimonials Section (Voices That Inspire Generations) –Add inspiring testimonials from alumni to motivate current and prospective students.
Website View:
On the Alumni page, the Hero Section appears at the top with a welcoming banner and introduction. Below that, theAlumni Info Section presents stories and highlights about the alumni community and their contributions. At the end, theTestimonials Section showcases alumni voices in a dedicated block, displayed in a carousel or grid format, helping to inspire and strengthen the bond between past and present students.
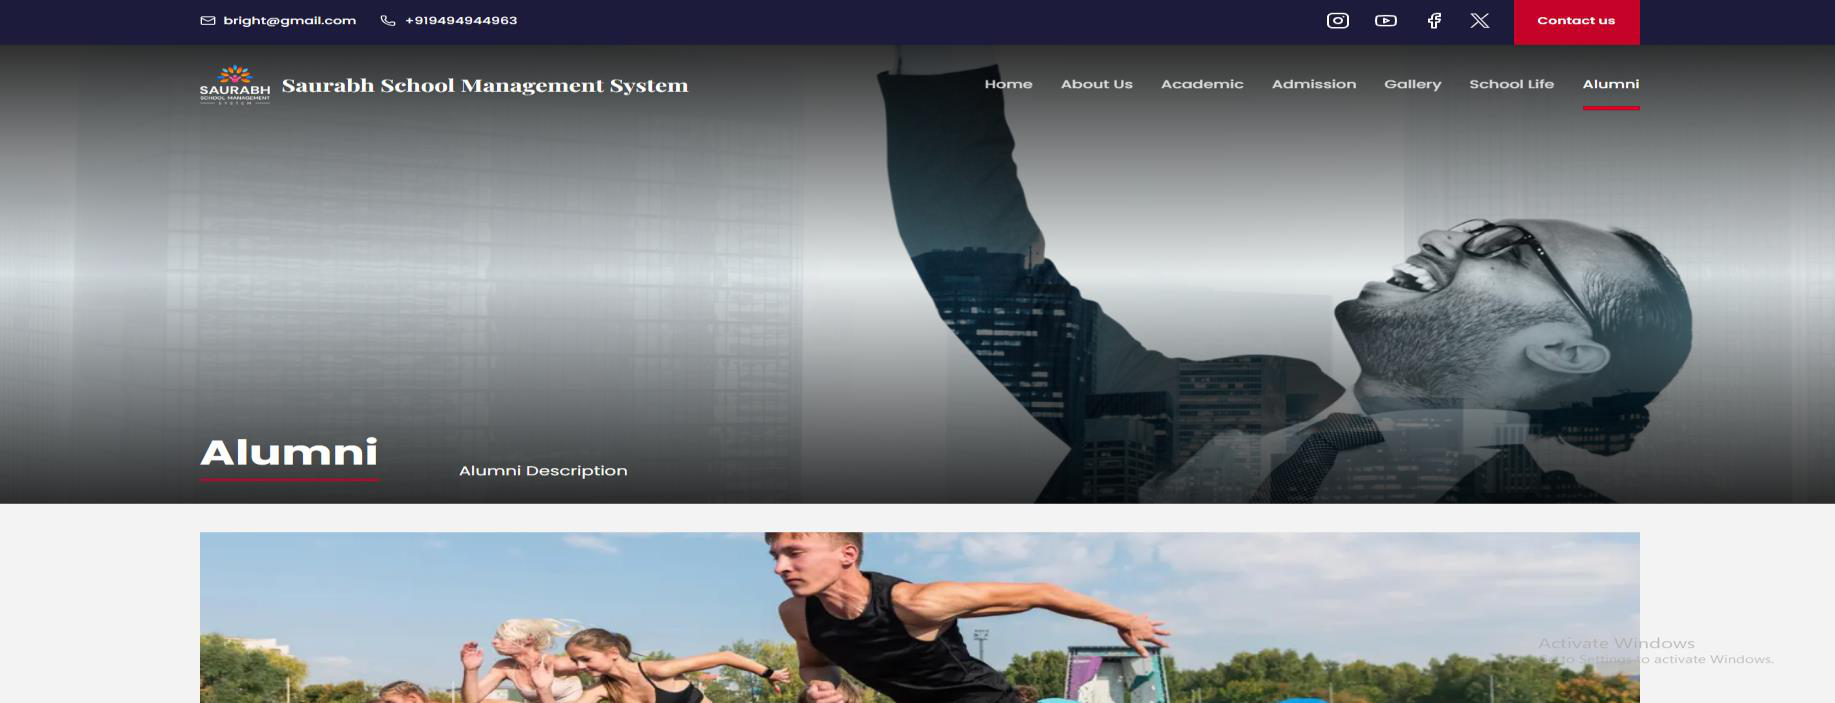
Each section can be added, edited, or updated to keep alumni stories and contributions highlighted on the website.
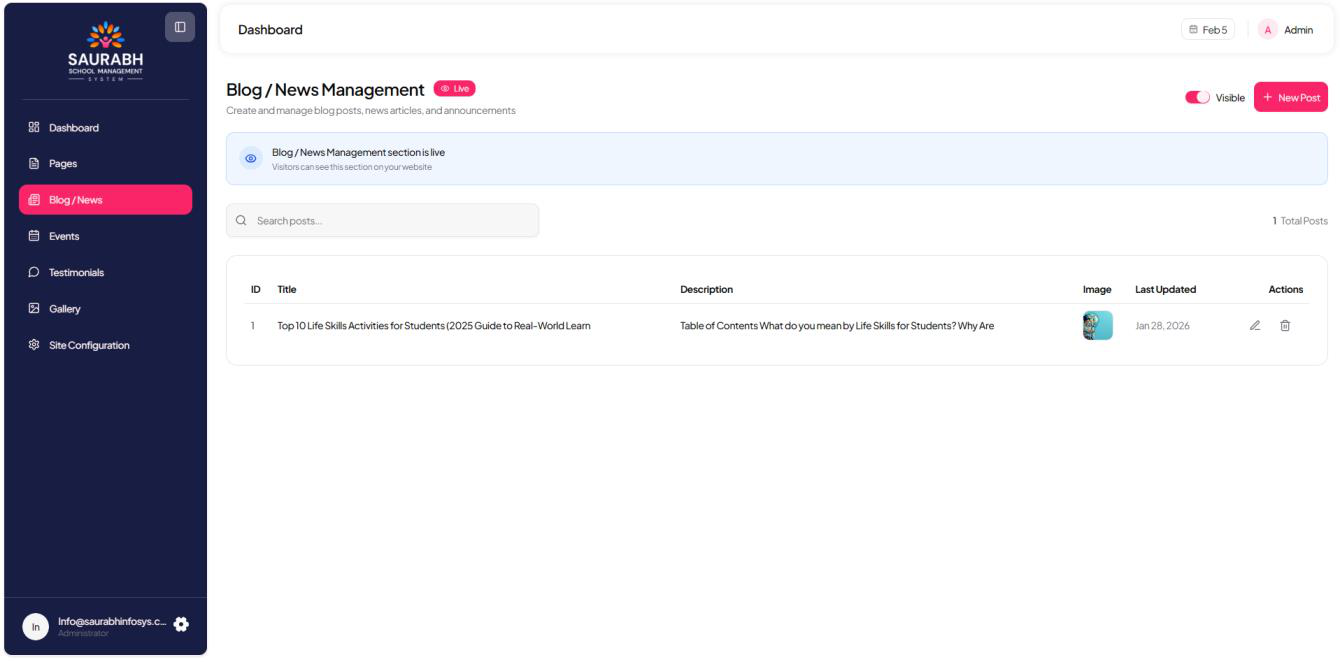
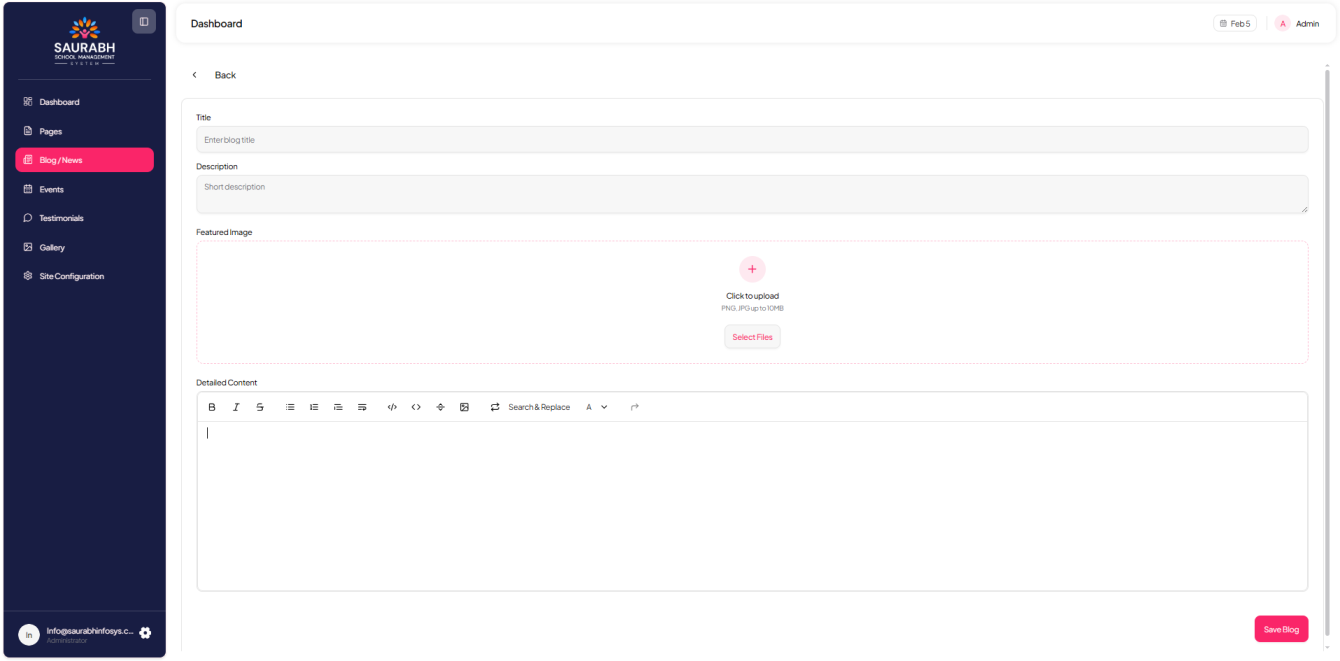
Blog / News Management Page
The Blog / News section allows administrators to publish important updates, announcements, and stories. All published blogs or news posts will automatically appear on the Homepage as well as the Blog / News page.
From the admin panel, you can:
- Add New Blog / News – Create new posts with title, content, images, and publish date.
- Update Existing Posts – Edit blog or news details anytime.
- Delete Posts – Remove outdated or irrelevant blogs/news from the website.
- Visibility Control – Using the Visible toggle/button, admins can easily show or hide any blog or news post on the website without deleting it.
This feature ensures that students, parents, and visitors always stay informed with the latest updates.
Create new posts with title, detailed description, images, and publish date using a rich Detailed Content Editor (similar to a Word editor), allowing formatted text and image embedding.
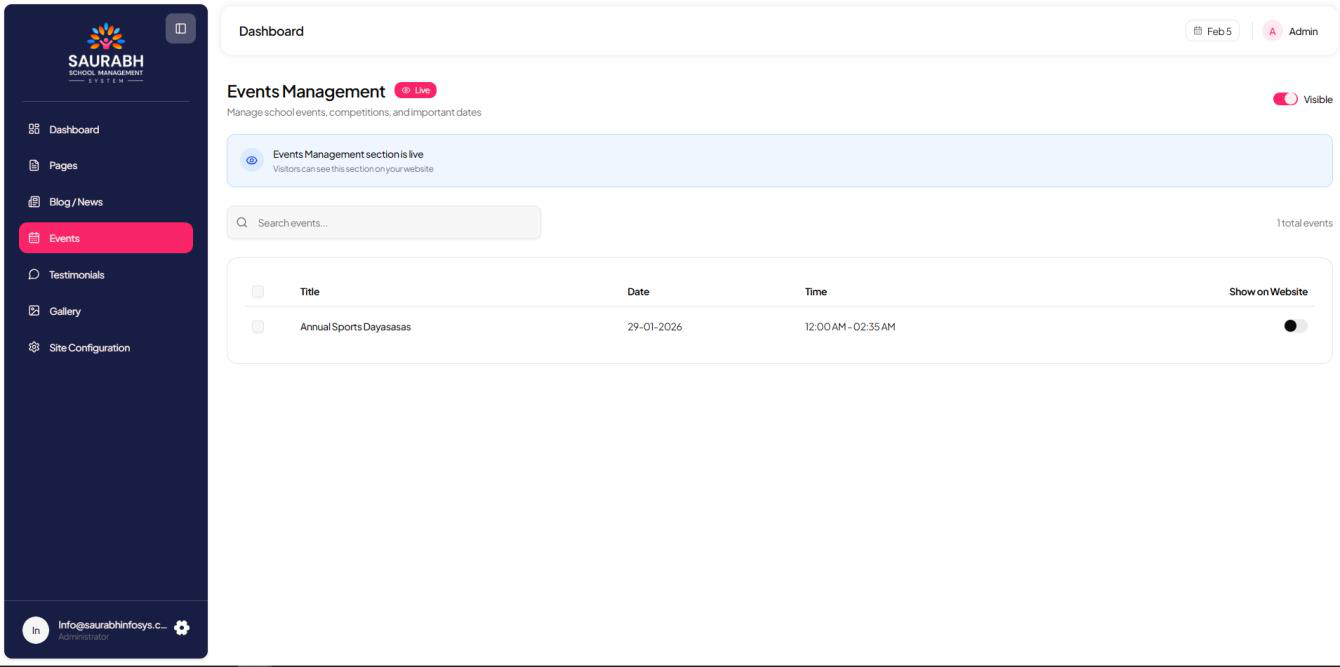
Event Management Page
The Events section allows administrators to control which school events are displayed on the website. Events are first created in the SMS Admin Panel and then synced to the website admin panel.
From the admin panel, you can:
- View Events – See the list of all events fetched from the SMS Admin Panel.
- Show/Hide on Website – Enable or disable the “Show on Website” option for each event.
- Homepage Display – Approved events will automatically appear on the Homepage under the events section.
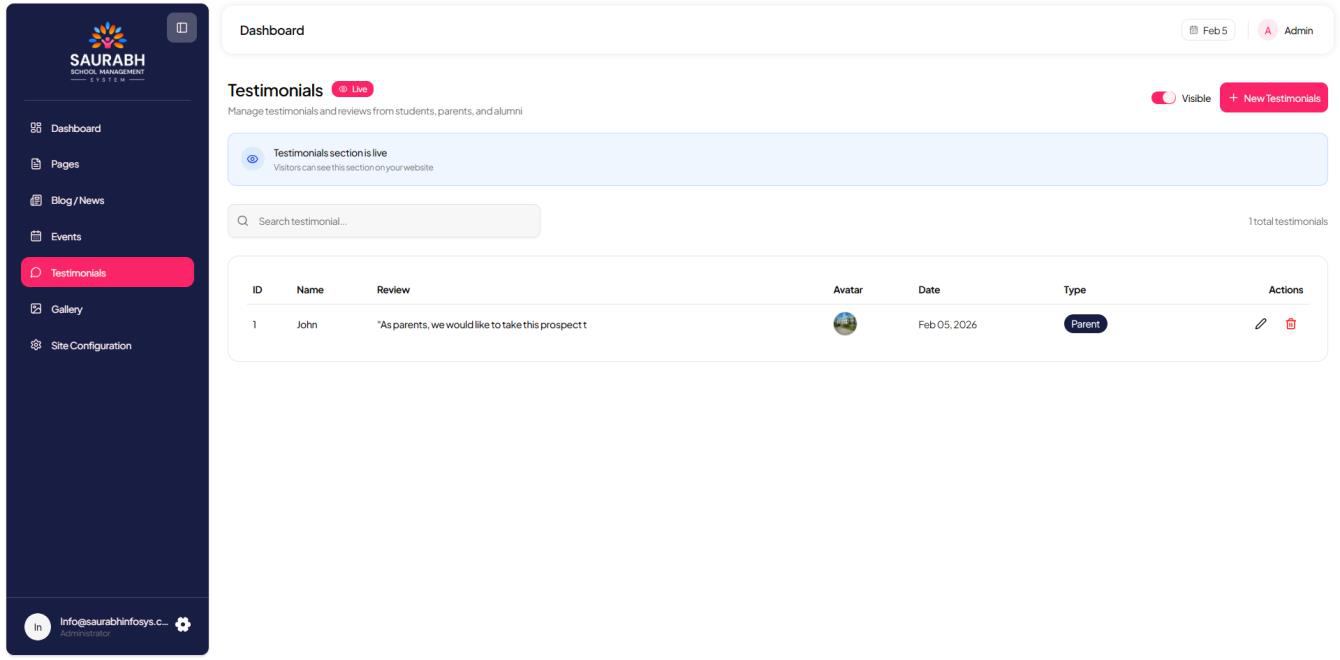
Testimonials Management Page
The Testimonials section allows administrators to showcase feedback and experiences from students, parents, and alumni. These testimonials help build trust and credibility for the school.
From the admin panel, you can:
- Add Testimonials – Create new testimonials with name, designation, message, and image (if any).
- Update Testimonials – Edit existing testimonials to keep them relevant.
- Delete Testimonials – Remove outdated or unwanted testimonials.
Approved testimonials will be displayed on the website in the designated testimonial section.
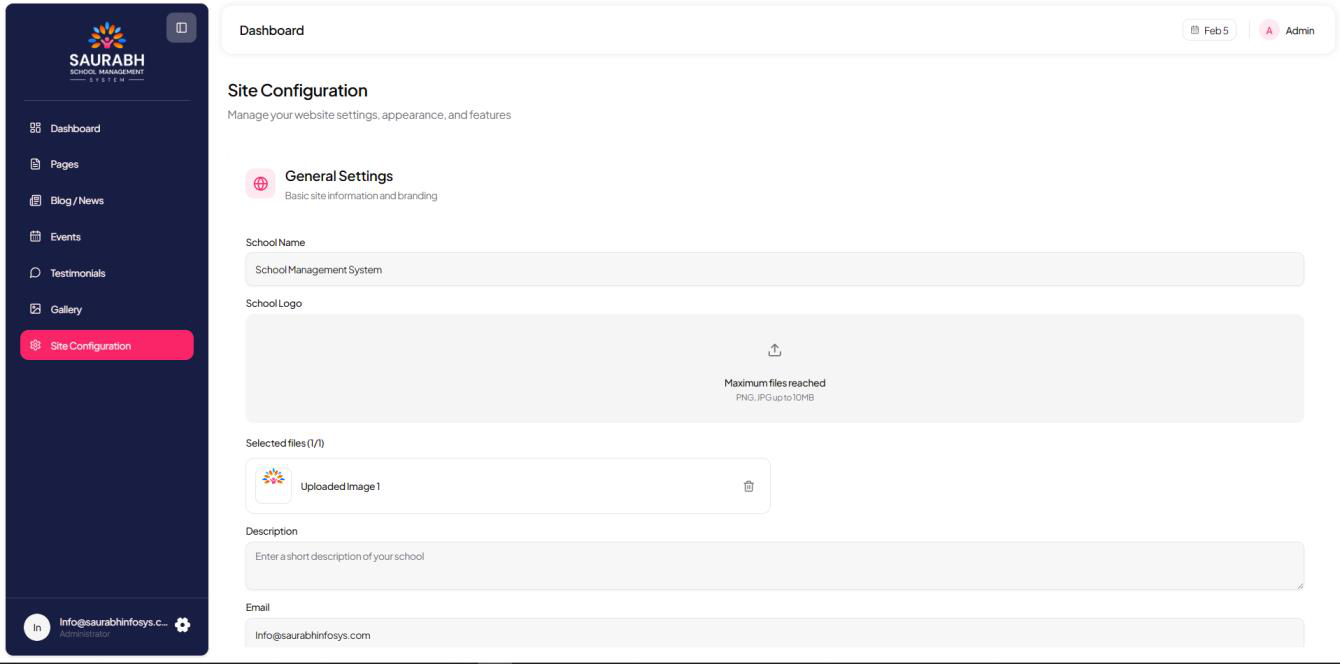
Site Configuration Page
The Site Configuration section manages common information and general settings of your school website.
From the admin panel, you can update:
- School Name
- Phone Numbers
- Email Address
- Location / Address
- Other common site details (used across the website footer and contact sections)
Keeping this section updated ensures that visitors always see accurate and reliable school contact details.